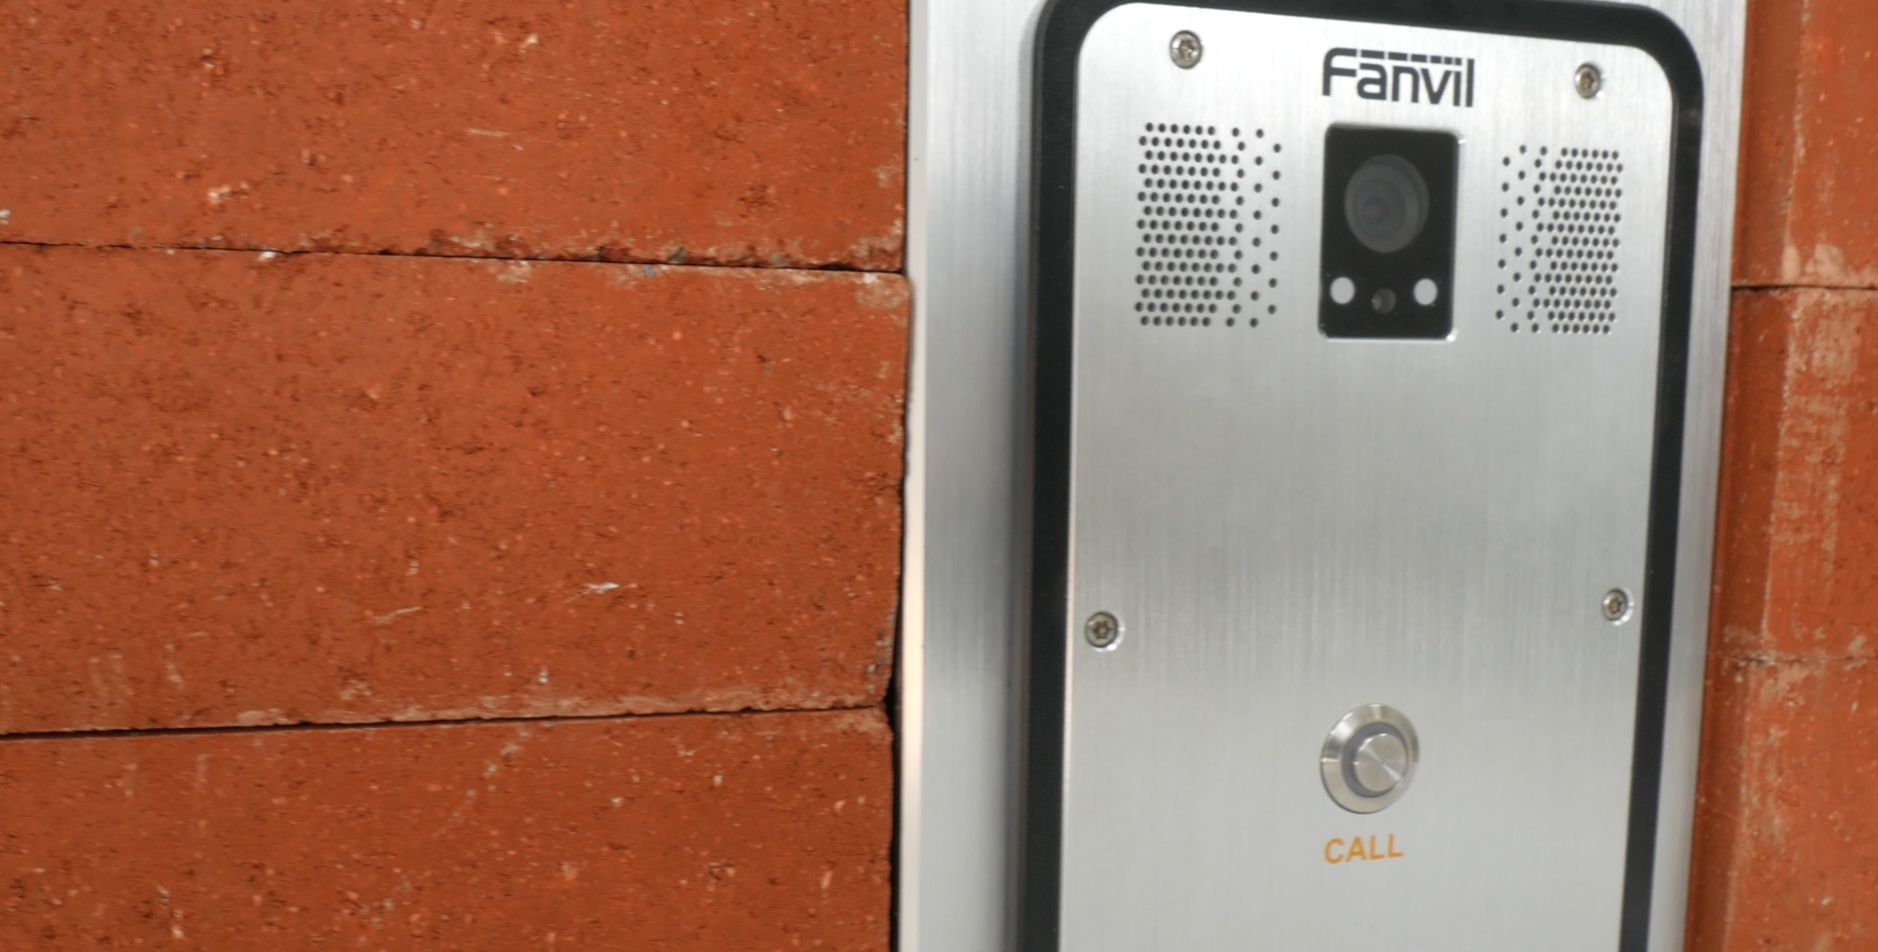
Flush Mounting Fanvil’s i18S Video Intercom

Want to achieve a seamless look for your Fanvil door access units? A range of Fanvil models can be flush mounted. This blog will demonstrate how you can flush mount the Fanvil i18S using the Fanvil EX31 following this step by step guide. This installation guide also applies to the Fanvil i23S and Fanvil i31S door phones.
Surface Mount Vs Flush Mount?
Deciding whether to surface mount or flush mount your door access devices is a matter of opinion and personal preference. Surface mount will position the door intercom on the surface of a wall. With Fanvil’s EX31 flush mount kit, you can easily place the device inside the wall to achieve a flat and flushed appearance. Each solution has it’s advantages and disadvantages. Before making a decision, there are some things to consider:
Weather Protection – Flush mount has higher weather protection
Flush mount will protect your door intercom / door phone from weather, in comparison to surface mount. With the surface mount, your device will be more exposed to surroundings, therefore, If you’re looking for a solution that has weather protection, we highly recommend getting yourself a flush mount kit!
However, you must consider that there are many door access units with high IP ratings. The majority of Fanvil’s door access units have IP 65 ratings, including the i18S, i31S and i32S. Fanvil’s new i6 series benefit from a high IP66 rating, for protection against rain and wind. If you’re looking to flush mount your Fanvil i6 series video door phone, you will require the EX101 flush mount kit for the i61 and EX102 for the i62, i63 and i64.
The shell of the device should also be considered. The Fanvil i18S, i23S and i31S feature a hooded design, which will naturally protect the intercom from some rain. Nevertheless, choosing a flush mount is recommended.
Impact Protection – Flush mount has higher protection against impact
Since the flush mount kit places the door intercom / door phone inside the wall, the side and back of the shell is protected. The surface mount will expose the side of the shell, therefore, is at higher risk of impact damage. The Fanvil i18S, i31S and i23S have high resistance against impact with IK10 rating for protection against 20 joules of impact.
Ease of installation – Surface mount is easier to install
The surface mount is generally easier to install. However, if you have the right guidance, flush mounting your device can be simple. That’s what we are here for! The next part of this blog will provide you with steps to flush mount your Fanvil i18S.
Fanvil’s products come with a surface mount kit. Their EX31 Flush mount kit (compatible with Fanvil i18S, i23S and i31S) must be purchased separately. You can find prices on your customer portal or if you are looking for more advice, please contact us directly on 03330144340 | sales@yellowgrid.co.uk
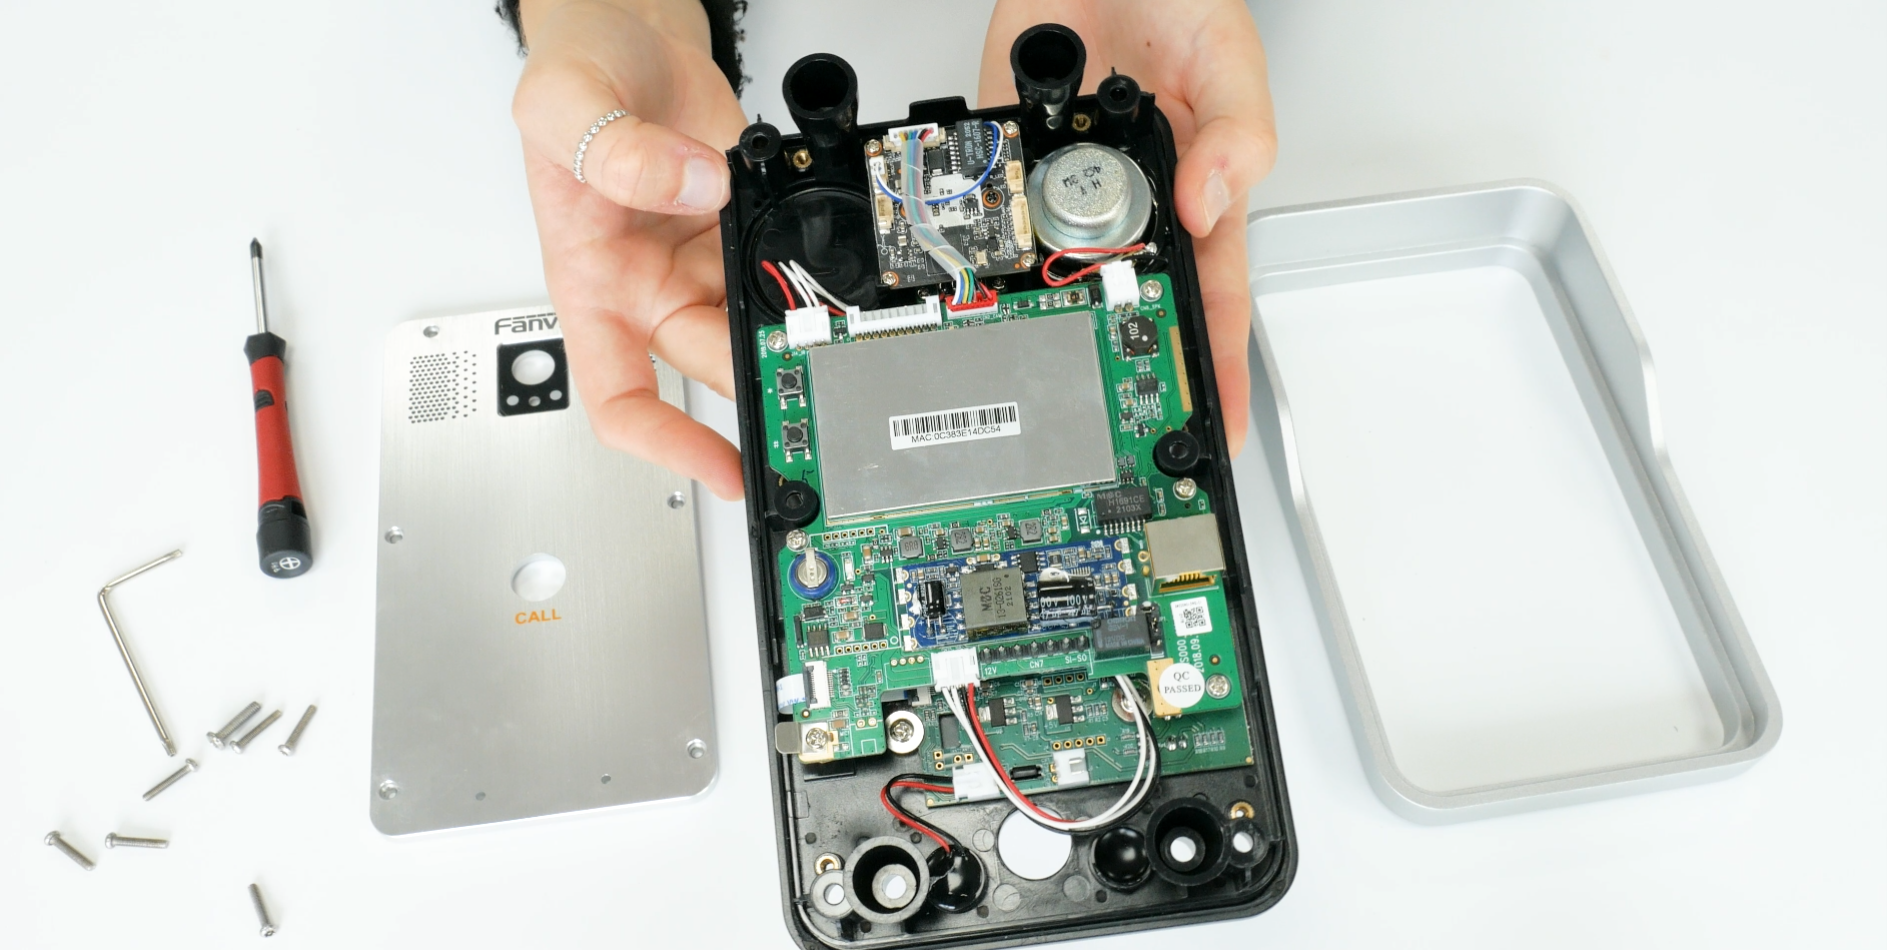
Dismantling the Fanvil i18S
Firstly, remove the screws from the Fanvil i18S faceplate. This will allow you to disconnect the faceplate. Once you have removed the faceplate, more screws are uncovered. Remove the visible internal screws to separate the door phone and original rain cover from the shell of the i18S.
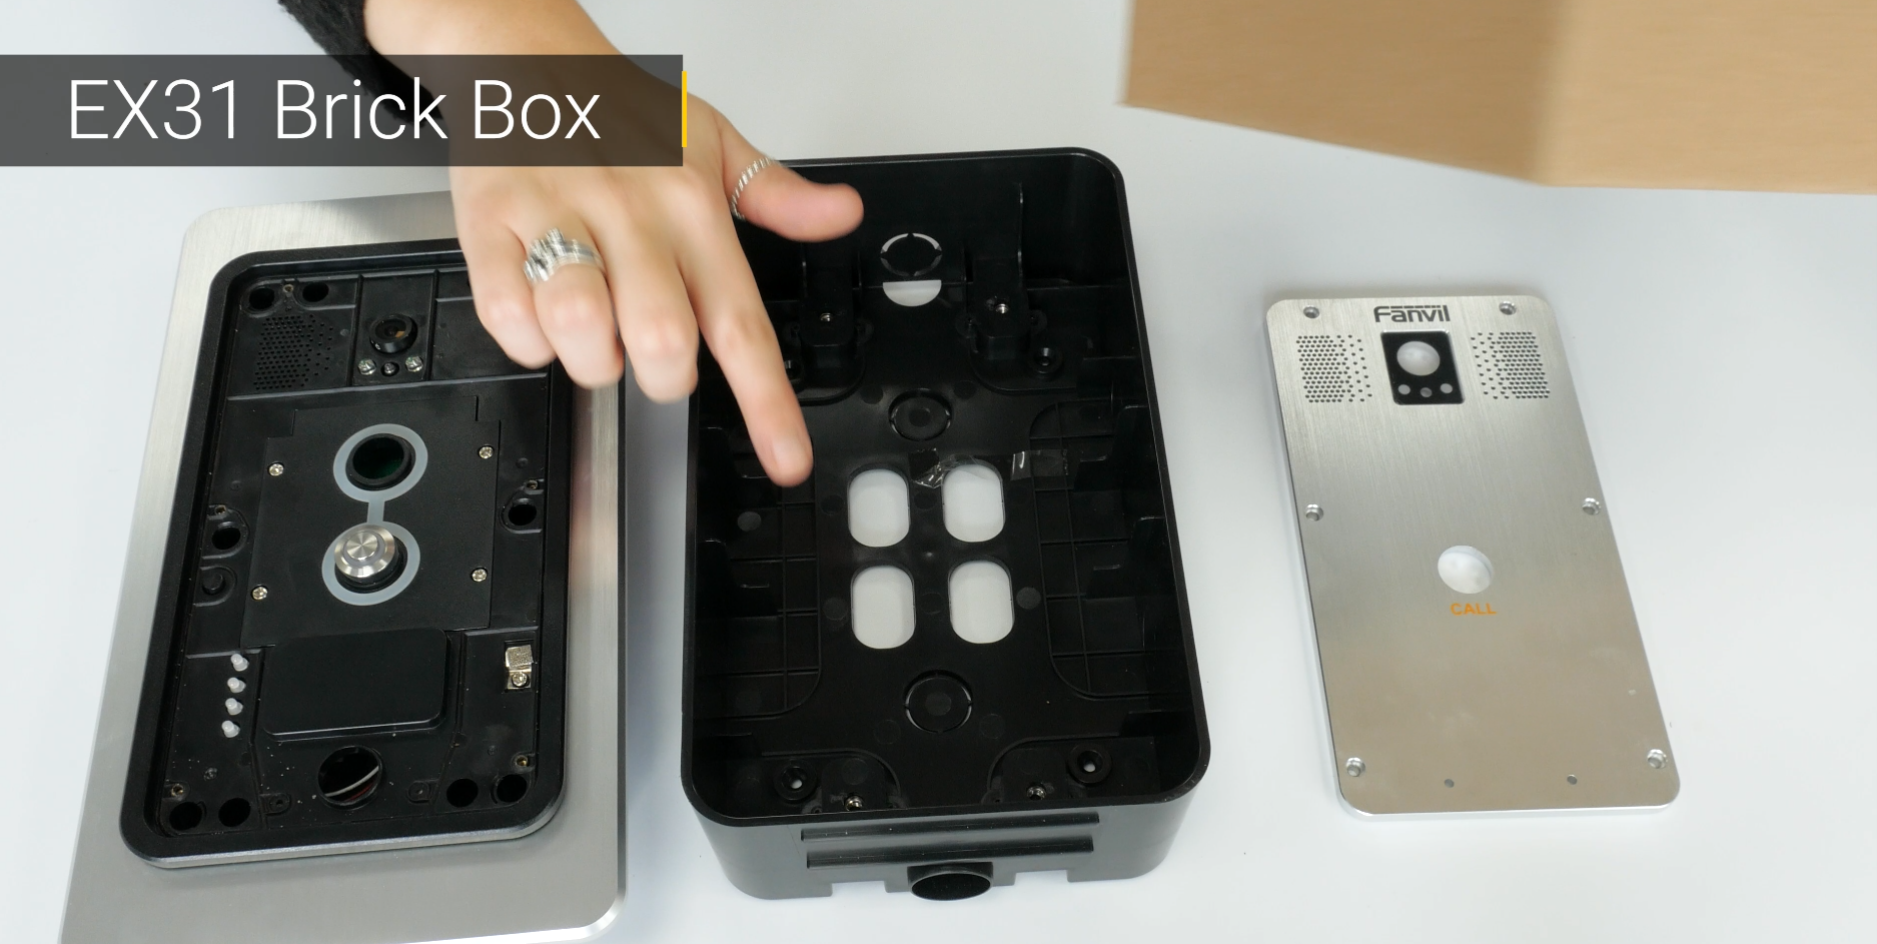
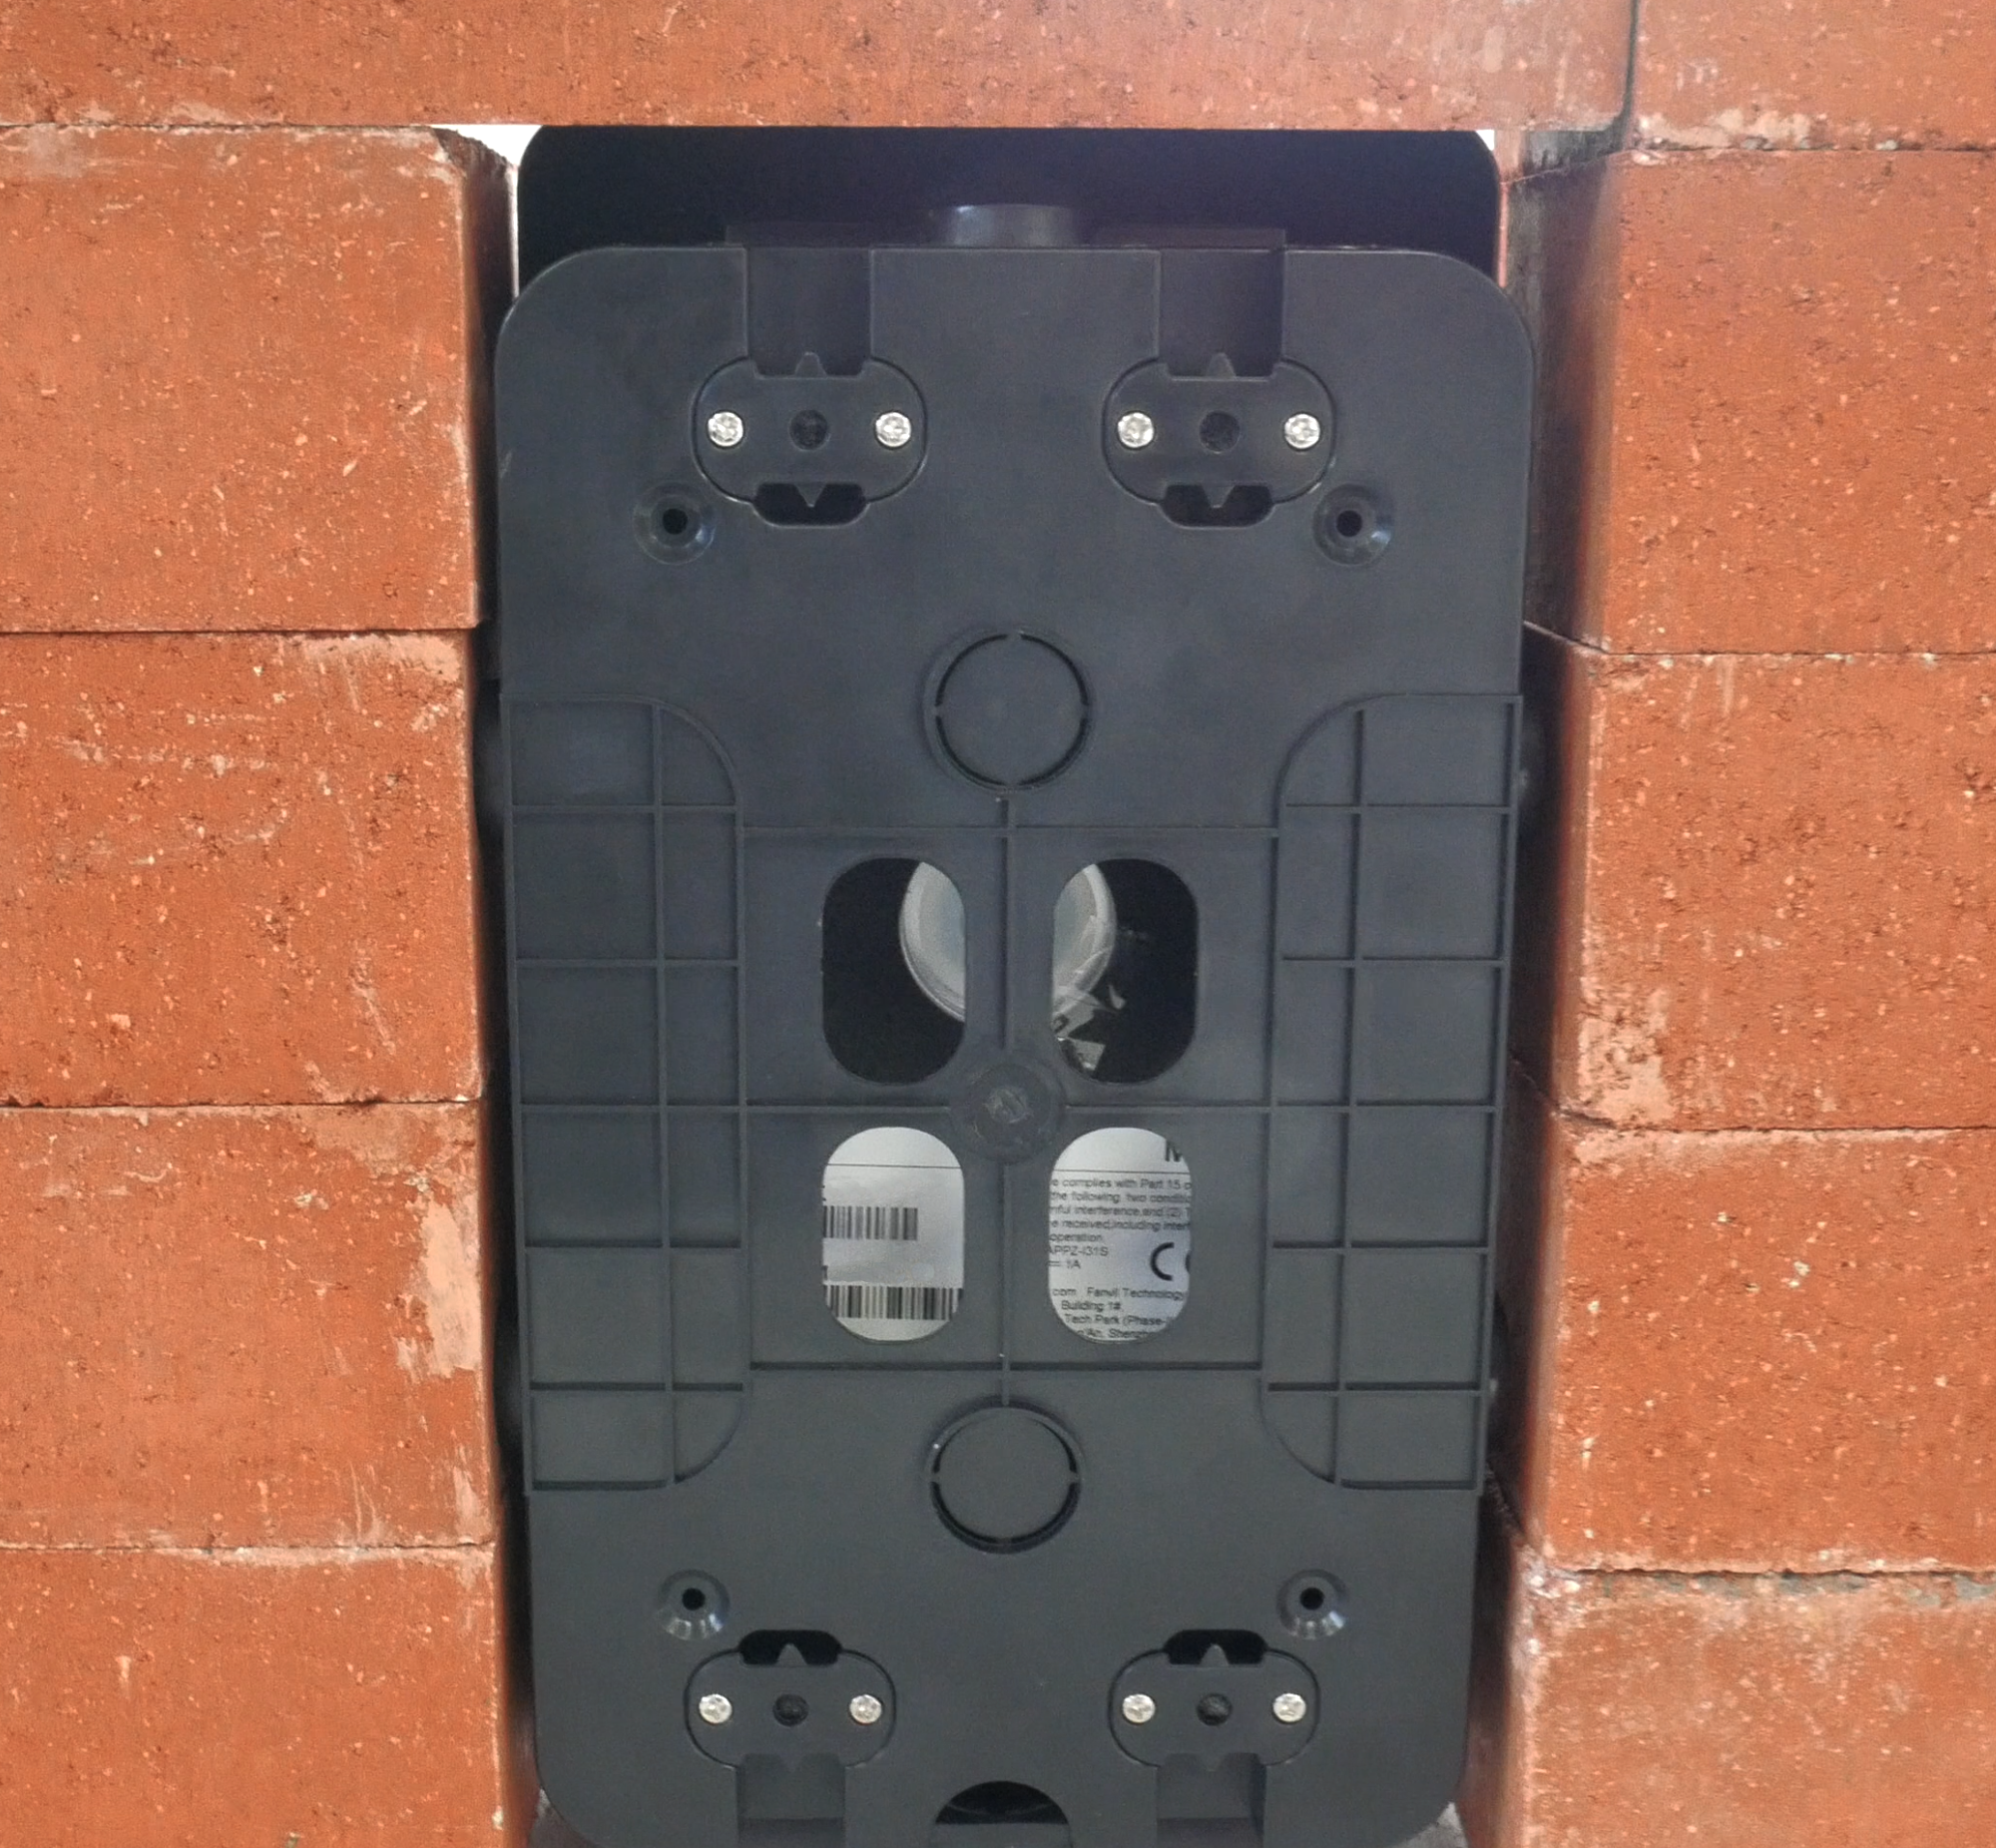
Fanvil EX31 Kit and Brick Box
Now that you have a dismantled Fanvil i18S, lay out the component parts alongside the Fanvil EX31. The Fanvil EX31 kit comes with:
Brick box | Frame panel / decor frame
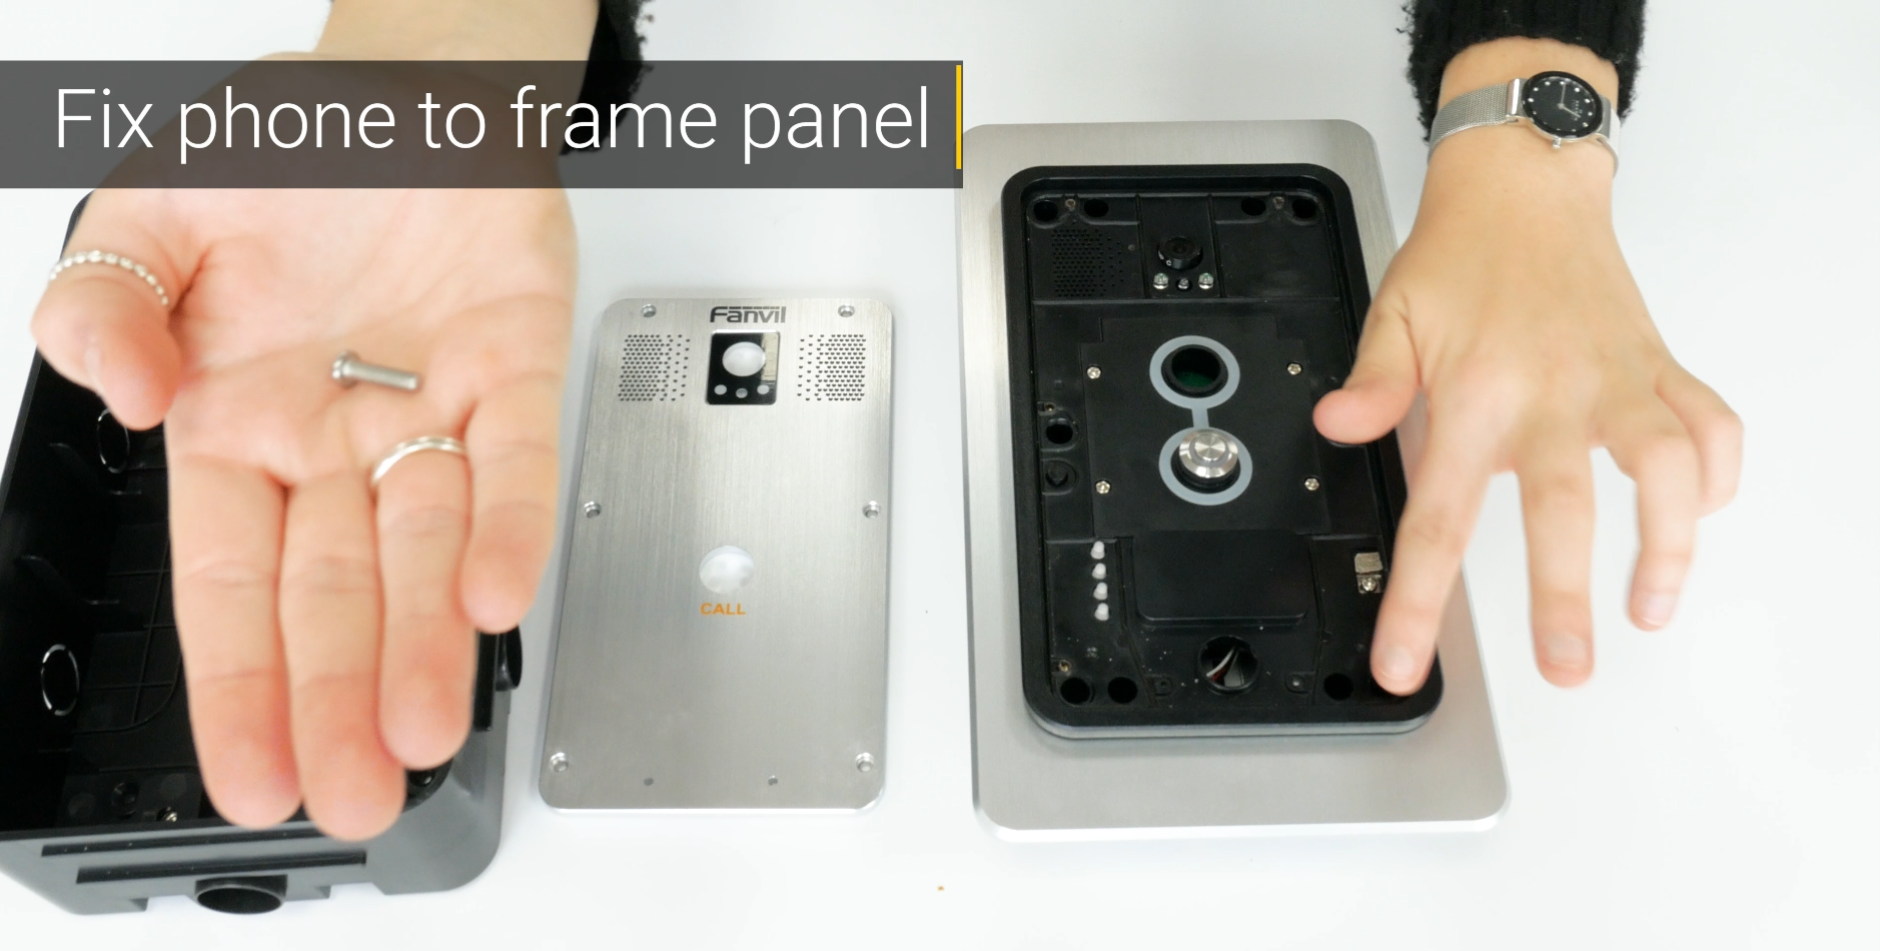
Prepare the Fanvil i18S so the door phone is ready to place inside the EX31 brick box.
Place the new frame panel, which comes with the EX31, on the i18S shell. Then, insert and fix the body of the i18S and frame panel to the shell with screws.
Insert the i18S (without faceplate) into the EX31 brick box. Secure i18S in place using the screws that come with the EX31.
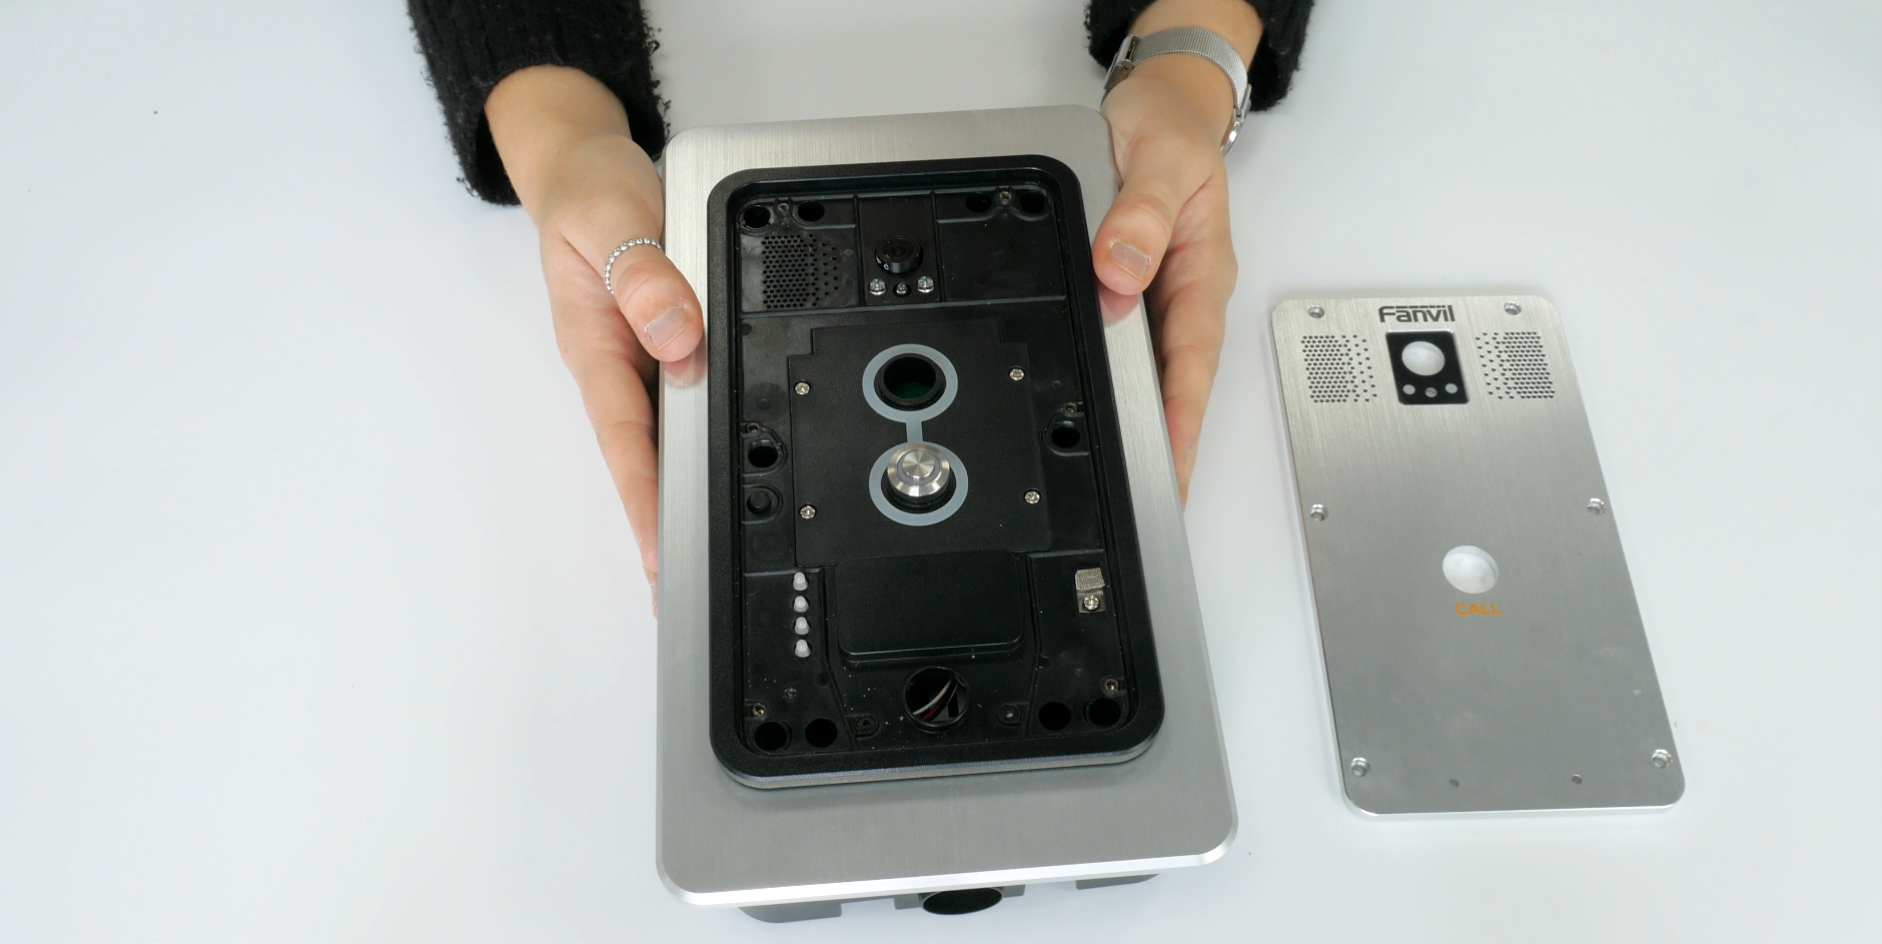
Finally, add the faceplate and there you go! It’s as simple as that.
Your door phone is now ready to flush mount into the wall.
If you are still struggling, don’t hesitate to contact our helpful support team! Please contact us support@yellowgrid.co.uk | 03330144340